The Mockcat recommended in this issue is a tool set for front-end separation development.
Project Introduction
Mockcat provides modular management of Mock data, definition and testing of interface data (support for JSON5/XML document formats, Mock.js syntax rules), operation logs of Mock data, and Mock service capabilities for data. In addition, it also provides some tools commonly used in development and a collection of tool classes of the website.
Mock test
A MOCK test is a test method that is created with a dummy object during testing for some object that is not easy to construct or obtain.
Installation and operation
- Install Node.js
- Execute the following command from the console:
>  npm install

>  npm start
If running a compressed version, set debug in config.js to false, then run npm run build, then npm start.
Instructions
1. Add Mock data module
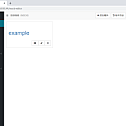
Click the Add Module button to add a new Mock data module. The added data module can be modified or deleted. Click Version History to view the modified version of the Mock data. Click Proxy Configuration (displayed as the port number) to configure the port of the Mock and the URL of the route (omit the module name when using the Mock data, keeping it consistent with the developed URL, for example: /=> /example/).

2.Mock data file editing
Click the module name in the MOCK data Edit page to go to the Mock data edit page. The Mock data is stored in a file system that corresponds to the URL path and operates on the Mock data in the same way as the file. Select the node of the directory tree, you can add, modify or delete the node, click the “copy” button, you can choose different operations in the list to copy data, files or folders. Click [Export] button, you can choose to export the incoming and outgoing POJO files. Click Test to test the native Mock interface (similar to Postman, but with support for JSON5 and XML formatting and annotations), and click Link address to view a list of Mock data or files.

3. Mock data editor
Mock data directory only supports data in JSON and XML format, you can add annotations to JSON and XML data. It is common to add comments to the file (to describe the interface), but it is also possible to comment the field (to describe the meaning of the field). Note: /**/ and < ! —-> Comments cannot be nested, and both comments and data editing can be performed using shortcut keys, as shown in the shortcut keys list below.

Full screen and Find replacement

List and Edit preview
4. Mock interface testing
JSON and XML data files stored in the system can be used to test local API interfaces. Click [Test]. A dialog box will pop up to test the Mock interface. The URL, Method, Headers, and incoming parameters from the template will be filled directly into the corresponding input box. The first URL uses http://127.0.0.1:8080 as the default server address. You can manually change the URL to the actual API server address. The URL will be recorded in the Cookie. If the interface to be tested requires login authentication, you need to log in to the interface before testing it.

5. Mock service for data
During the development process, both front-end and back-end development can negotiate to modify the interface data structure, and the edited Mock can be used for front-end development pages. Select a different directory node and click [link address] to see the Mock data (you can omit the extension) , as shown in the figure. After the background development is completed, the server address can be switched to the development server for debugging, and the status parameter can be added to the address to specify the returned status code. Note: The editor validates JSON and XML data against the JSON5 and XML standards, respectively, and can only save and convert Mock data if it conforms to the standards.


