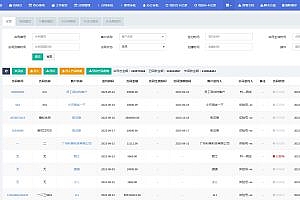
This issue recommends a high-level, open source SQL review platform based on Go writing, Yearning lightweight MySQL SQL statement review platform for small and medium businesses. Provide query audit, SQL audit and other functions.

main function
1.SQL inquire
-
- Query work order
- derive
- Automatic completion, intelligent tips
- Query statement audit
- Query results desensitized
2.SQL audit
-
- Process sheet
- SQL statement syntax detection
- Check the compliance of SQL statements based on rules
- Automatically generate DDL/DML rollback statements
- Historical audit record
3.push
-
- E-mail Work order push
- Dingding webhook machine manual single push
4.User rights and management
-
- role definition
- Fine-grained permissions based on users
- register
5.else
-
- todoList
- LDAP register
- Configure dynamic audit rules
- Customize the audit level
6.AutoTask autoexec
Yearning Authority design
Yearning users are divided into three categories in the form of roles, submissioners/Operators/super administrators. The super administrator is a visible management page role, and the submitter/operator is a non-visible management page role. Categorize users by role Yearning before fine-grained permission partitioning. So that administrative class permissions do not appear in the user fine-grained permissions division
You can configure the corresponding ddl/dml/ query data source according to the actual requirements of each user. Each type of authority is independent of each other and does not interfere with each other.
1.Type of authority
Yearning rights are divided into two categories
- role-based access control
- Fine-grained permissions
Role permission: Submitter/Operator/Super administrator This permission is used to define the permission boundary of each user and specify the function entry
Fine-grained permissions: DML/DDL/ query data source access permissions, query the superior auditor
2.Set user rights
1.The super administrator can create a permission group on the Permission Group page and assign the permission to the group.
2.The super administrator selects a user in the user rights page and grants the user rights (a single user can grant multiple permission groups and automatically resends the permission group when the permission is repeated).

Ready for use
Before officially using Yearning, you need to setup the following setup(please be sure to take a few minutes to read!) .
- Create users and validate their roles
- Create permission groups and assign them to the corresponding users
- Add data source information
- Create custom audit rules for data sources
- Configure the configuration information on the Settings page
- Tailor custom audit rules to your needs
1.Create a user
Yearning users can create in the following ways:
- Choose Management > Users. The admin user creates a user.
- Open the Allow Registration configuration in the Administration -> Settings page and save. Registrants can register by clicking the Registration button in the upper left corner of the yearning login page.
- Configure Management -> Set the Ldap information in the page and save it. ldap users can check ldap login on the yearning login page for user registration/login operations.
2.role
Yearning user roles are subiter, Operator, Super Administrator (admin user only).
Submitter: Only has the function of submitting work order and query
Operator: Based on the authority of the submitter, has the function of reviewing/executing work orders
Super administrator: Based on the previous two permissions, the super administrator has the administrator permissions for platform management, configuration, and audit rule setting.
Note: Roles are coarse-grained, and their purpose is to divide multiple user groups with different attributes to present different front-end page navigation information to different users. More granular permissions (for example, which data source the user is allowed to query, which data source the user is allowed to submit a work order to) are granted through permission groups.
All users except the admin user play the submitter role when creating an account (through registration /ldap login). If you need to change the role, you can change it by the admin user through the Administration -> Users page.
3.Create permission groups and assign them to the corresponding users
On the Manage -> Permission Groups page, admin can create, edit, or delete permission groups. The permission groups provide a variety of fine-grained permission controls (yearning currently permission controls only down to the data source level) as follows:
- The range of data sources that allow DDL work order submission
- The range of data sources that allow DML workorders to be submitted
- Allows querying the range of data sources for work order submissions
- Query the scope of the superior auditor
After the permission group is created, go to the Management -> User page, select the user you want to assign the permission group to and click the corresponding permission button to assign the permission group to the user.
A user can be assigned multiple rights groups. In multiple rights groups, the user integrates all rights of the two rights groups
A permission group can also assign rights to multiple users
how to use
- Initial learning
- Start juno(You can specify the port by -p. The default port is 50001)
- Enter GrpcAddr in conf.toml (default: 127.0.0.1:50001).
- debug
attention:
juno and Yearning must share the same database and Yearning share the same configuration file (if juno and yearning are not on the same host, a copy of the cofnig.toml file is needed in the same directory as juno. And the ip address and port of juno’s Yearning host are entered in the GrpcAddr configuration item in the config.toml file)
Since juno is currently only available in linux, developers working on mac/windows platforms are advised to launch juno using docker.

