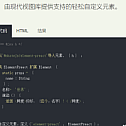
The Skate recommended in this issue is a functional reactive abstract Web component standard as a set of packages that allow you to write small, fast, and scalable Web components using popular video libraries such as React, Preact, and LitHTML.

Skate feature
- Compatible components across frameworks.
- Render components with your favorite gallery, or not at all.
- Guidelines for best practices when reflecting between attributes, attributes, and events, and when reacting to attributes, attributes, and events.
- Full TypeScript support.
Skate
The easiest way to get up and running is to start with a pre-configured element, such as @skatejs/element-lit-html.
npm i @skatejs/element-lit-htmlSimple example
import Element, { html } from '@skatejs/element-lit-html';

export default class extends Element {
  static get props() {
    return {
      name: String
    };
  }
  render() {
    return html`
      Hello, ${this.name}!
    `;
  }
}
cli
There is a CLI to help you get up and running:
https://skatejs.netlify.com/packages/cli.
$ npm i -g @skatejs / cli
$skatejs
filler
Skate builds on custom elements and shadow DOM standards. It is able to run without the Shadow DOM – it just means that you are not wrapping any of the HTML or styles of your components. This also means that you can provide a way to project content (i.e. < slot>) . It is highly recommended that you use the Shadow DOM whenever possible.
Although most modern browsers support these standards, some still require polyfill to implement missing or inconsistent behavior for them.
< Browser support
Skate supports all Evergreens and IE11 and is constrained by polyfills’ browser support matrix.
webcomponents.js (v1 polyfills)
A set of polyfill supporting Web component specifications:
- Custom Elements v1 : Allows authors to define their own custom tags (spec, tutorial, polyfill).
- Shadow DOM v1 : Encapsulation is provided by hiding DOM subtrees under shadow roots (spec, tutorial, shadydom polyfill, shadycss polyfill).
Includes some small polyfill for browsers that need it:
- HTMLTemplateElement
- Promise
- Event, CustomEvent,MouseEvent constructor and Object.assign, Array.from (see webcomponents-platform)
- URL constructor
How to use
< Install polyfill
npm install @webcomponents/webcomponentsjsYou can also load code from the CDN, such as unpkg: https ://unpkg.com/@
webcomponents/webcomponentsjs@^2/
Using webcomponents-bundle.js
Contains all
The webcomponents-bundle.jsweb component polyfills with any supported browser. All polyfill codes will be loaded, but each polyfill is only used for feature-based detection. The bundle includes custom elements, Shady DOM/CSS, and common platform polyfills (such as ES6 Promises, constructible events, etc.) (required by Internet Explorer 11) and templates (required by IE 11 and Edge).
Using webcomponents-bundle.js is very simple, but it loads code that most modern browsers don’t need, slowing down page loads. For best performance, use webcomponents-loader.js.
Here’s an example:
<!-- load webcomponents bundle, which includes all the necessary polyfills -->
<script src="node_modules/@webcomponents/webcomponentsjs/webcomponents-bundle.js"></script>

<!-- load the element -->
<script type="module" src="my-element.js"></script>

< ! -- use the element -->
< my-element> < /my-element>
Use webcomponents-loader.js
This webcomponents-loader.js is a client loader that uses feature detection to dynamically load the smallest polyfill package.
webcomponents-loader.js can load synchronously or asynchronously according to your needs.
Inline
< p data – track = “48” > if you have an inline source webcomponent – loader. Js, then you should be specified window. The WebComponents. Root as the root of loading polyfill. For example:
< script>
window.WebComponents = window.WebComponents || {};
window.WebComponents.root = 'node_modules/@webcomponents/webcomponentsjs/';
< /script>
This property is used to build the URL of the selected bundle, so you should only set it to a value that is not affected by user control data. If the trusted type is enforced, this attribute should be TrustedScriptURL.
< Synchronization
When loading synchronously, webcomponents-loader.js behaves like webcomponents-bundle.js.
loads the appropriate package document.write() to ensure that WebComponent polyfill is available for subsequent scripts and modules.
Here’s an example:
<!-- load the webcomponents loader, which injects the necessary polyfill bundle -->
<script src="node_modules/@webcomponents/webcomponentsjs/webcomponents-loader.js"></script>

<!-- load the element -->
<script type="module" src="my-element.js"></script>

< ! -- use the element -->
< my-element> < /my-element>
Asynchronous
When loaded asynchronously with the defer attribute, the polyfill package will be loaded asynchronously, This means that scripts and modules that depend on the webcomponents API must load using the webcomponents.waitfor function.
The WebComponents.waitFor function takes the callback function as an argument and evaluates the callback after loading the polyfill package.
The
callback function should load scripts that polyfills (typically via import(‘my-script.js’)) and should return a promise that parses after all scripts have been loaded.
Here’s an example:
< ! -- Load polyfills;  note that "loader" will load these async -->
< script
src="node_modules/@webcomponents/webcomponentsjs/webcomponents-loader.js"
defer
> < /script>

< ! -- Load a custom element definitions in `waitFor` and return a promise -->
< script type="module">
WebComponents.waitFor(() =>  {
// At this point we are guaranteed that all required polyfills have
// loaded, and can use web components API's.
// The standard pattern is to load element definitions that call
// `customElements.define` here.
// Note: returning the import's promise causes the custom elements
// polyfill to wait until all definitions are loaded and then upgrade
// the document in one batch, for better performance.
return import('my-element.js');
});
< /script>

< ! -- Use the custom element -->
< my-element> < /my-element>
—END—
Open Source license: MIT license