Dinky recommended in this issue is an out-of-the-box one-stop real-time computing platform.

Real-time is the future. Dlink was born for Apache Flink to make Flink SQL smooth and dedicated to the construction of real-time computing platform.
Dinky implements Dlink based on Apache Flink, enhances Flink application and experience, and explores streaming data warehouse. Standing on the shoulders of giants in innovation and practice, Dinky has unlimited potential in the future development trend of batch and flow integration.
class=”pgc-h-arrow-right” data-track=”4″>
A one-stop FlinkSQL and SQL real-time computing platform based on Apache Flink secondary development and easy to expand. It is committed to solving a large number of complex data caliber in the process of real-time and offline data development and data warehouse construction, so that the real-time, quasi-real-time and offline integrated data development platform can be used out of the box in the data governance process.
Its main objectives are as follows:
- Visual interactive FlinkSQL and SQL data development platform: automatic prompt completion, syntax highlighting, debugging and execution, syntax verification, statement beautification, global variables, etc
- Supports a full range of FlinkSQL job submission methods: Local, Standalone, Yarn Session, Yarn Per-Job, Kubernetes Session, Kubernetes Application
- Supports all Apache Flink connectors, UDFs, CDCS, etc.
- Support for FlinkSQL syntax enhancements: compatibility with Apache FlinkSQL, table value aggregation function, global variables, CDC multi-source merge, execution environment, statement merge, shared session, etc.
- Supports easily extensible SQL job submission methods: ClickHouse, Doris, Hive, Mysql, Oracle, Phoenix, PostgreSql, SqlServer, etc.
- Support real-time debug preview Table and ChangeLog data and graphical display
- supports syntax logic checking, job execution planning, field-level kinship analysis, etc.
- Support Flink metadata, data source metadata query and management
- Support real-time task O&M: job online and offline, job information, cluster information, job snapshot, exception information, job log, data map, AD hoc query, historical version, alarm record, etc.
- Support the ability to be a multi-version FlinkSQL Server and OpenApi
- Support easy to expand real-time job alarm and alarm group: Dingtalk, wechat enterprise number, etc.
- Support fully managed SavePoint startup mechanism: last time, first time, specified time, etc
- Supports multiple resource management: cluster instance, cluster configuration, Jar, data source, alarm group, alarm instance, document, user, system configuration, etc.
class=”pgc-h-arrow-right” data-track=”36″>Dinky

How to deploy

Single-machine deployment
Unzip to the specified directory: Dlink does not rely on any external Hadoop or Flink environment. It can be deployed separately from flink, hadoop, and K8S clusters. It is fully decoupled and supports simultaneous connection of multiple cluster instances for O&M.
tar -zxvf dlink-release-0.5.0-SNAPSHOT.tar.gz
mv dlink-release-0.5.0-SNAPSHOT dlink
cd dlink
Initialization database: Dlink uses mysql as the back-end repository, mysql support 5.6+. This assumes that you have mysql installed. First, you need to create the Dlink back-end database, which is created as the default library in the configuration file.
# mysql span
mysql -uroot -proot@123
# authorize and create database  Span
mysql>  grant all privileges on *.* to 'dlink'@'%' identified by 'dlink'  with grant option;
mysql>  grant all privileges on *.* to 'dlink'@'fdw1' identified by 'dlink'  with grant option;
mysql>  flush privileges;
# log in with dlink user  Span
mysql -h fdw1  -udlink -pdlink
mysql>  create database dlink;
There are two sql files in the sql folder of the dlink root directory, namely dlink.sql and dlink_history.sql. If you deploy for the first time, you can execute the dlink.sql file directly under the dlink database. (If a dlink database has been established before, dlink_history.sql stores the upgraded sql of each version, and can be executed as required according to the version number)
# First login to mysql Span >
mysql -h fdw1  -udlink -pdlink
mysql>  use dlink;
mysql>  source /opt/dlink/sql/dlink.sql
configuration file
Once the database is created, you can modify the dlink connection to mysql configuration file, according to your personal situation.
# Switch directory
cd /opt/dlink/config/
vim application.yml
With the configuration file modified, the next step is to install nginx. If nginx is installed, it can be ignored. nginx is required for Dlink deployment. nginx must be deployed before it can be started.
After the execution, next, deploy the nginx service.
Deploy nginx
In linux, you must first configure the corresponding yum library, because there is no configuration during the installation process, here can describe the following steps, you can choose to connect to the network or local yum source, here choose the network connection configuration.
#
wget -O /etc/yum.repos.d/CentOS-Base.repo  http://mirrors.aliyun.com/repo/Centos-7.repo
# clear the cache
yum makecache
# Next install nginx span
yum -y install epel-release
yum -y install nginx
sudo systemctl enable nginx
sudo service nginx start
sudo service nginx reload
nginx -v
# Finally check the process to see if it starts properly  Span >
ps -ef|grep nginx
Note: nginx is optional for Dinky-0.5.0 and above.
Configure dlink in nginx
If it is nginx installed from yum source, the configuration file is under etc. If it is installed from source package, please find the configuration file by yourself
# Switch to nginx configuration directory
cd /etc/nginx/
vim /etc/nginx/nginx.conf Open the configuration file and modify the contents of the server. The contents of the server can be configured as follows.
  server {
        listen       9999;
        #listen       [::]:80;
        server_name  bigdata3;
        root         /usr/share/nginx/html;
                gzip on;
     		gzip_min_length 1k;
		gzip_comp_level 9;
		gzip_types text/plain application/javascript application/x-javascript text/css application/xml text/javascript application/x-httpd-php image/jpeg image/gif image/png;
		gzip_vary on;
		gzip_disable "MSIE [1-6]\.";

        # Load configuration files for the default server block.
        include /etc/nginx/default.d/*.conf;

        location / {
            root   html;
            index  index.html index.htm;
			try_files $uri $uri/ /index.html;
        }
        error_page 404 /404.html;
        location = /404.html {
        }

        error_page 500 502 503 504 /50x.html;
        location = /50x.html {
        }

        location ^~ /api {
            proxy_pass http://192.168.0.0:8888;
            proxy_set_header   X-Forwarded-Proto $scheme;
            proxy_set_header   X-Real-IP         $remote_addr;
        }
}- listen to port
- Store html path
- location/This can be specified as an absolute path
When the configuration is complete, save and exit. And restart nginx and reload the effective
$systemctl restart nginx.service
$systemctl reload nginx.service
# Check whether the nginx configuration is successful  Span >
nginx -t
$nginx -s reload
load dependencies
Dinky has its own Flink environment. The implementation of this Flink environment requires users to create their own plugins folder in the root directory of Dinky and upload related Flink dependencies. For example, flink-dist, flink-table, etc., please read Readme (subsequent extension dependencies are also placed in this directory). You can of course specify FLINK_HOME in the startup file, but this is not recommended.
Dinky The current version of yarn’s perjob and application execution modes rely on Flink-shade-hadoop to start, and the Flink-shade-hadoop package needs to be added.
# Create directory
cd /opt/dlink/
mkdir plugins
Upload Flink-shade-hadoop to the plugins file directory. For hadoop2 or hadoop 3, you can use flink-shade-Hadoop-3 as follows:
https://mvnrepository.com/artifact/org.apache.flink/flink-shaded-hadoop-3-uber?repo=cloudera-repos After unzipping the structure as shown above, modify the content of the configuration file. The lib folder contains the dlink extension files, and the plugins folder contains the official flink and hadoop extension files (if introduced in the plugins)
flink-shaded-hadoop-3-uber or other jars that may conflict, please manually delete javax.servlet and other conflicting contents). All the jars in the plugins need to be downloaded and added according to the version number to experience the full functionality, of course, you can also put your own modified Flink source compilation package. The extends folder is only managed as a backup for extensions and is not loaded by dlink.
Please check if the corresponding version of flink is added to the plugins, flk-dist, flk-table,
flink-shaded-hadoop-3-uber, etc. Dependencies as shown above!!
Please check if the corresponding version of flink is added to the plugins, flk-dist, flk-table,
flink-shaded-hadoop-3-uber, etc. Dependencies as shown above!!
Please check if the corresponding version of flink is added to the plugins, flk-dist, flk-table,
flink-shaded-hadoop-3-uber, etc. Dependencies as shown above!!
if introduced under plugins
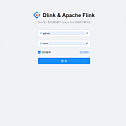
If the jar of flink-shaded-hadoop-3-uber is deleted manually, you can access the default 8888 port number (such as 127.0.0.1:8888) and open the front-end page.
If CDH and HDP use open source Flk-shade, it has no impact on Dlink. Other dependencies depend on the compatibility between CDH or HDP and open source versions. You need to add dependencies based on compatibility to use all functions of Dlink.
Start Dlink
# start  span
$sh auto.sh start
# stop  span
$sh auto.sh stop
  span
$sh auto.sh restart
# view status  span
$sh auto.sh status
class=”pgc-h-arrow-right” data-track=”98″> metadata management
When a user views or uses DDL or DML in a data source, the relevant DDL or DML in the data source can be obtained from the metadata center. The metadata center currently contains:
- Table information
- SQL generate
In SQL generation:
- FlinkDDL statement
- SELECT statement
- SQLDDL statement
First enter the metadata in FlinkSQL Studio, select the configured data source, and the corresponding schema of the data source will appear.


After the above schema appears, view the table under the schema, right-click the table under the schema to see the table information, field information and SQL generation.


class=”pgc-h-arrow-right” data-track=”96″>

Studio execution information

SQL


document center

Add user

System Settings
—END—
Open source protocol: Apache-2.0