The Sketch plugin recommended in this issue includes drawing links and tags, UI toolkit and color synchronization, font and text replacement.
Sketch is a set of plugins that includes drawing links and markers, UI toolkits and color synchronization, font and text replacement, and a collection of plugins for designing sketches, allowing WeChat designers and developers to use sketches more efficiently.
features
- More efficient board team collaboration, such as UI Kit synchronization, color synchronization, etc.
- Faster fonts, font design, icon library connections, annotations, text replacement, and icon libraries.
- More accurate restoration of the front-end, such as exporting images of equal width and height, exporting CSS code (supporting mini programs), etc.
Quick Start
Create a new Sketch drawing board, select WeSketch=>Manage UIKit=>Synchronize UIKit. This plugin provides you with three usable examples.
Choose WeUI or other, and the drawing board you open will download the HTTP board that has been clicked on to the server’s UIKit and import your current drawing board.
How to set up
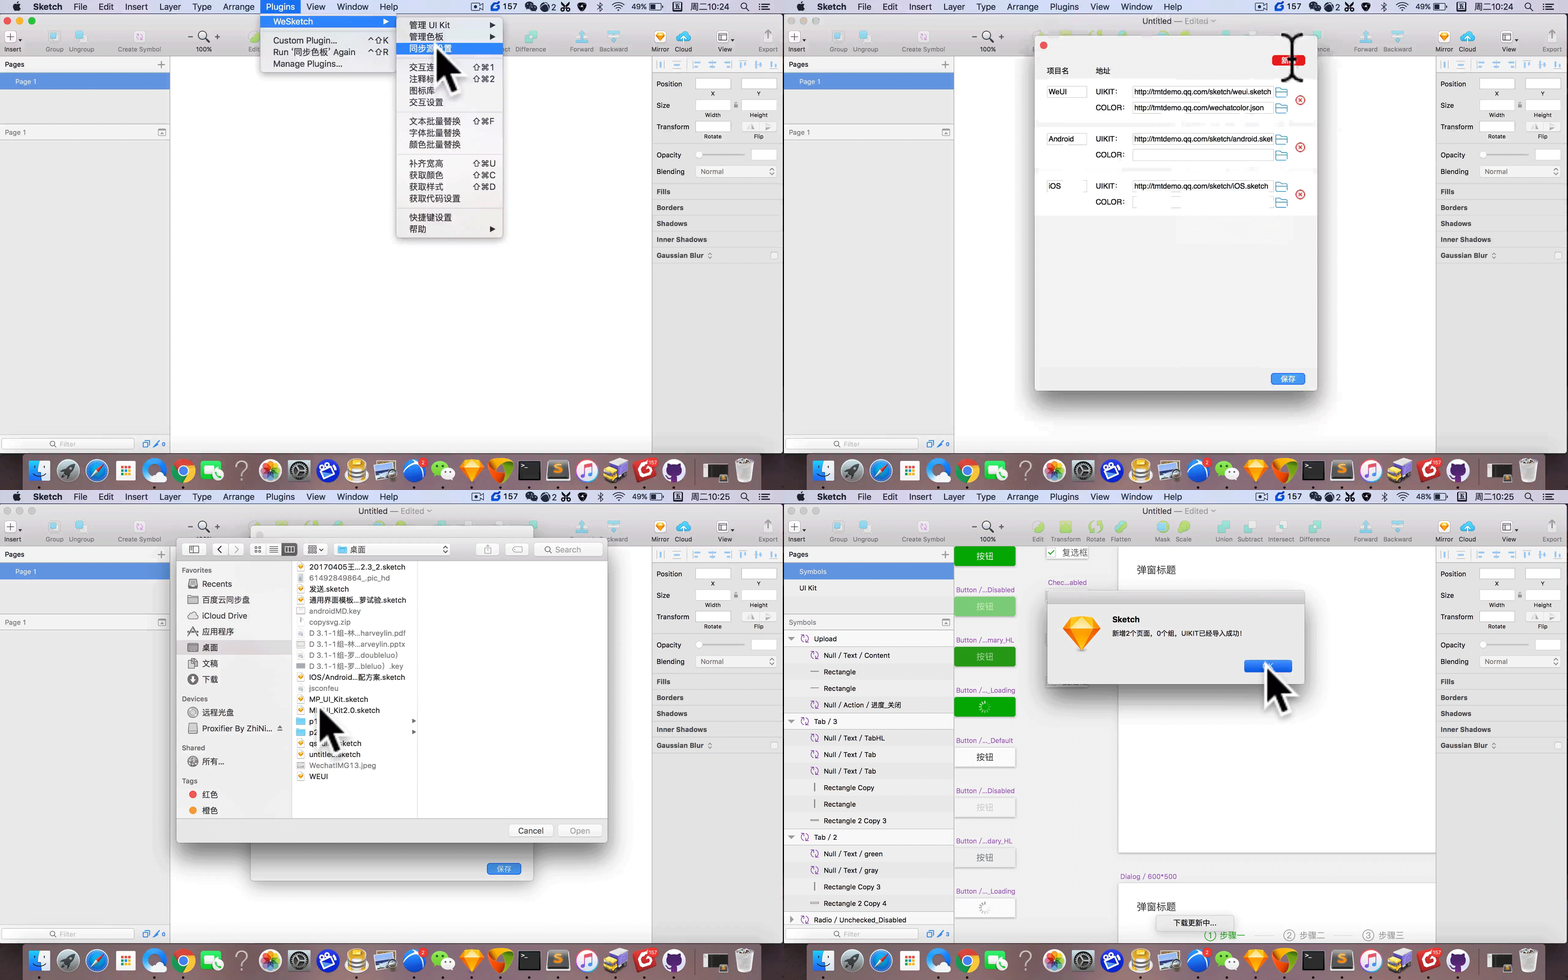
Open WeSketch=>Sync Source Settings. The following interface appears on the screen.
According to the example, you can create a UIKit for uploading to the network and add the input configuration of the interface to the already configured address.
Teaming up allows us to use the synchronization group UIKit locally, and we can also choose the ability to synchronize local files. Click on the DropBox provided by the folder to select.
Manage color palette
Create a new Sketch canvas and select WeSketch=>Manage Palette=>Sync Palette. This plugin provides you with a usable example.
Select WeUI and click OK. The canvas you have opened will download the palette that has already been placed on the HTTP server and import it into your current canvas.
You can see the synchronized color standard library in the Document Colors panel of your color settings.
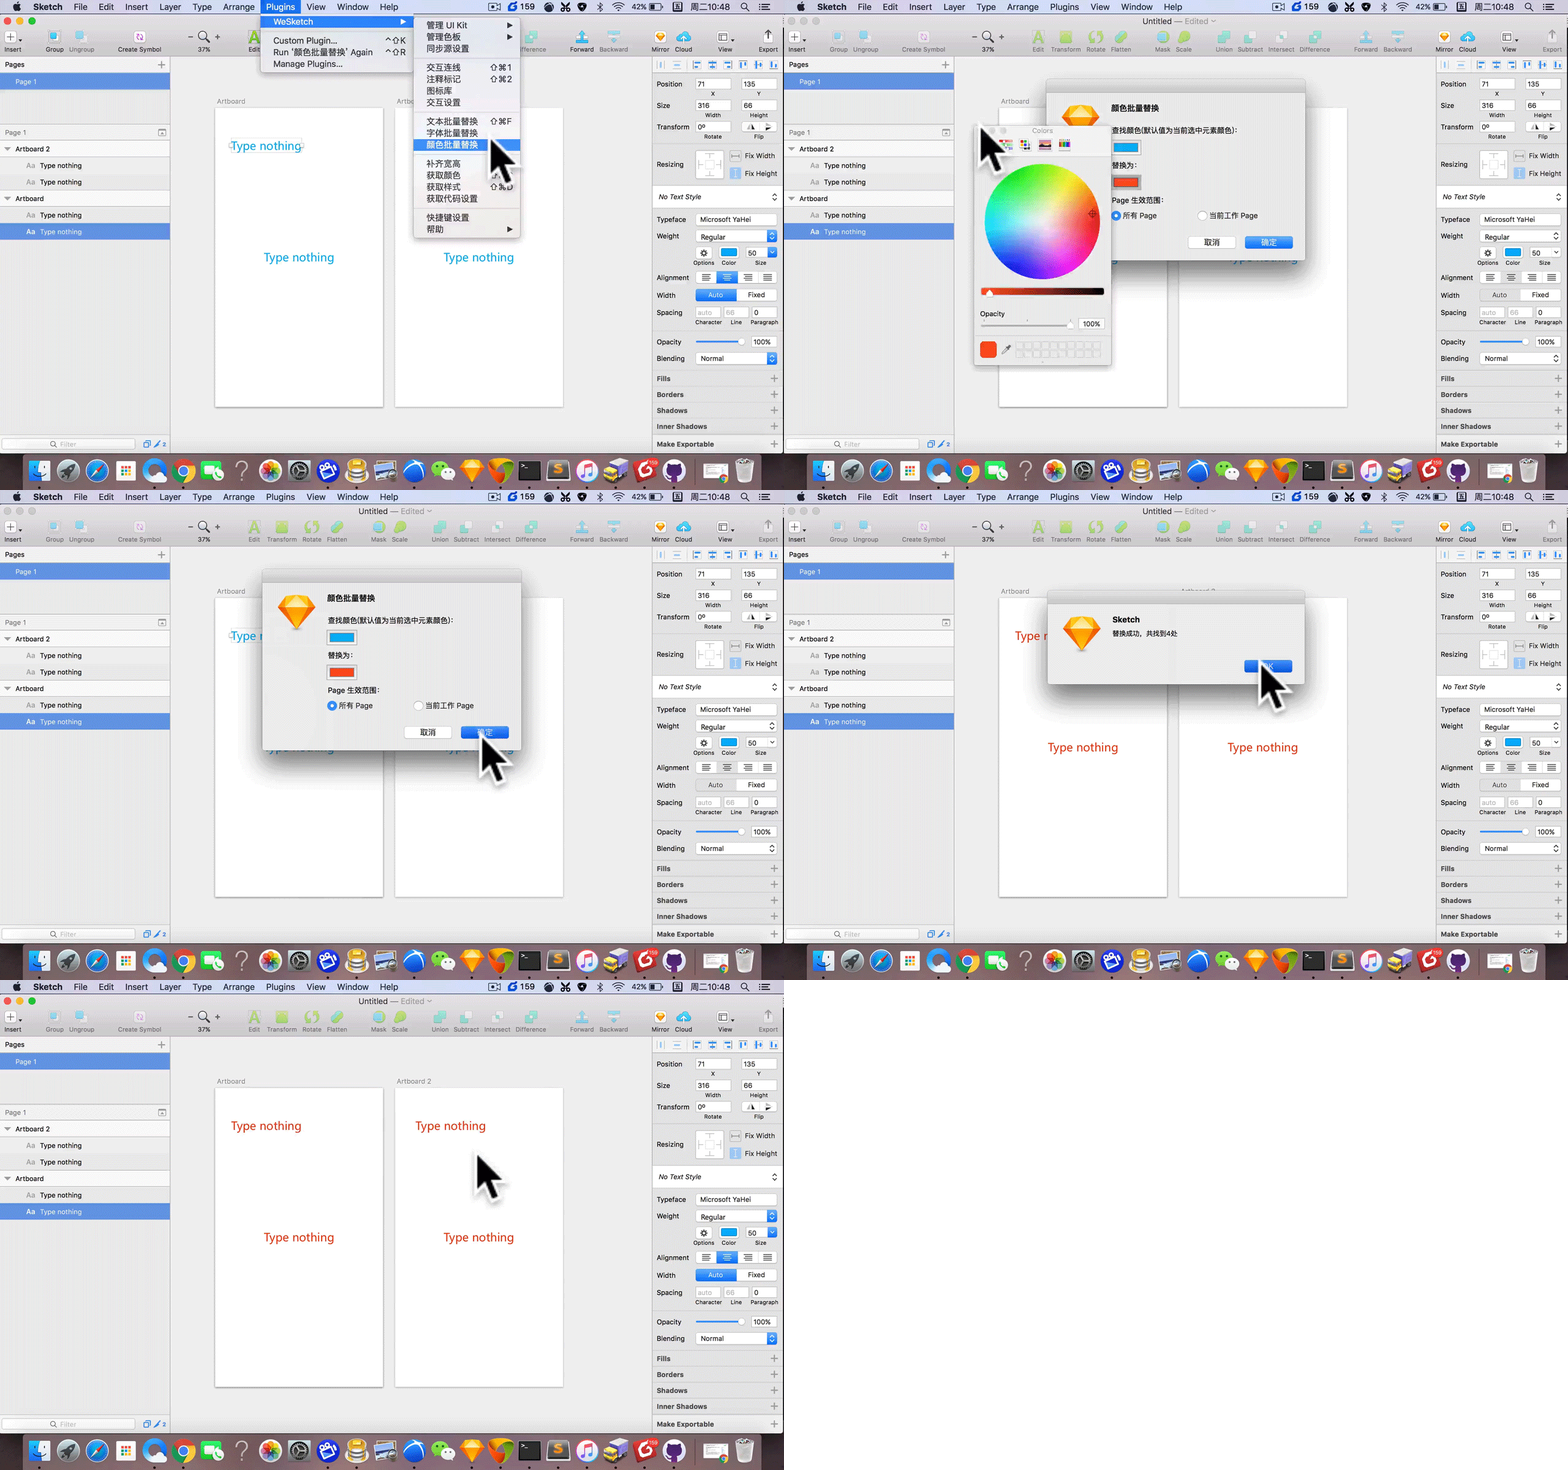
Replace text, font, color
The quickest way to modify a global color is to first select the element with that color, and then turn on the global replacement color function. You will find that the selected element color has already appeared in the replacement panel. (The full text replacement is also the same)
Font batch replacement is used to solve the problem of text fonts in the original design draft no longer adapting to the new version after the iOS major version upgrade.
Comments Token
It is highly recommended to note down the functional shortcut keys, with the initial shortcut keys being command+shift+2. If you want to customize shortcut keys, you can open WeSketch=>Shortcut Settings to customize shortcut keys.
This function only has one function key, which is the interactive connection button. But there are still many details.
- Select an element, if it has not been tagged before, press the shortcut key to add a tag on the right.
- Select an existing tag on the right and press the shortcut key to delete the tag on the right and generate the tag on the left.
- Select an existing tag on the left and press the shortcut key. If the selected number is not the last tag on the page (if there is a 9 on the page, delete the 8th tag), an option will pop up on the page.
- Select to delete tags and keep sorting (selecting this option will delete tag 8, leave tag 9 unchanged, and the next tag will start with tag 8)
- Delete tags and reorder (selecting this option will remove the 8 tag, and then the 9 tag will become 8. If there are still tags in the future, it will be sorted in sequence, and the next tag will start from the last number after the last one)

Generate code (supports mini programs)
This feature provides a setting function, which not only exports standard web styles, but also exports mini program code in units of RPX. Click on ‘Get Code Settings’ to replace the obtained code with the RPX standard. The design standard of RPX is based on a width of 750, so non 750 width design drafts will be converted according to the size of the mini program.
Icon Library
Open WeSketch=>icon library, click on any icon in the icon library, and your artwork will appear in the center for quick use during the design interaction process.
Searching for the icon you need can speed up finding it.
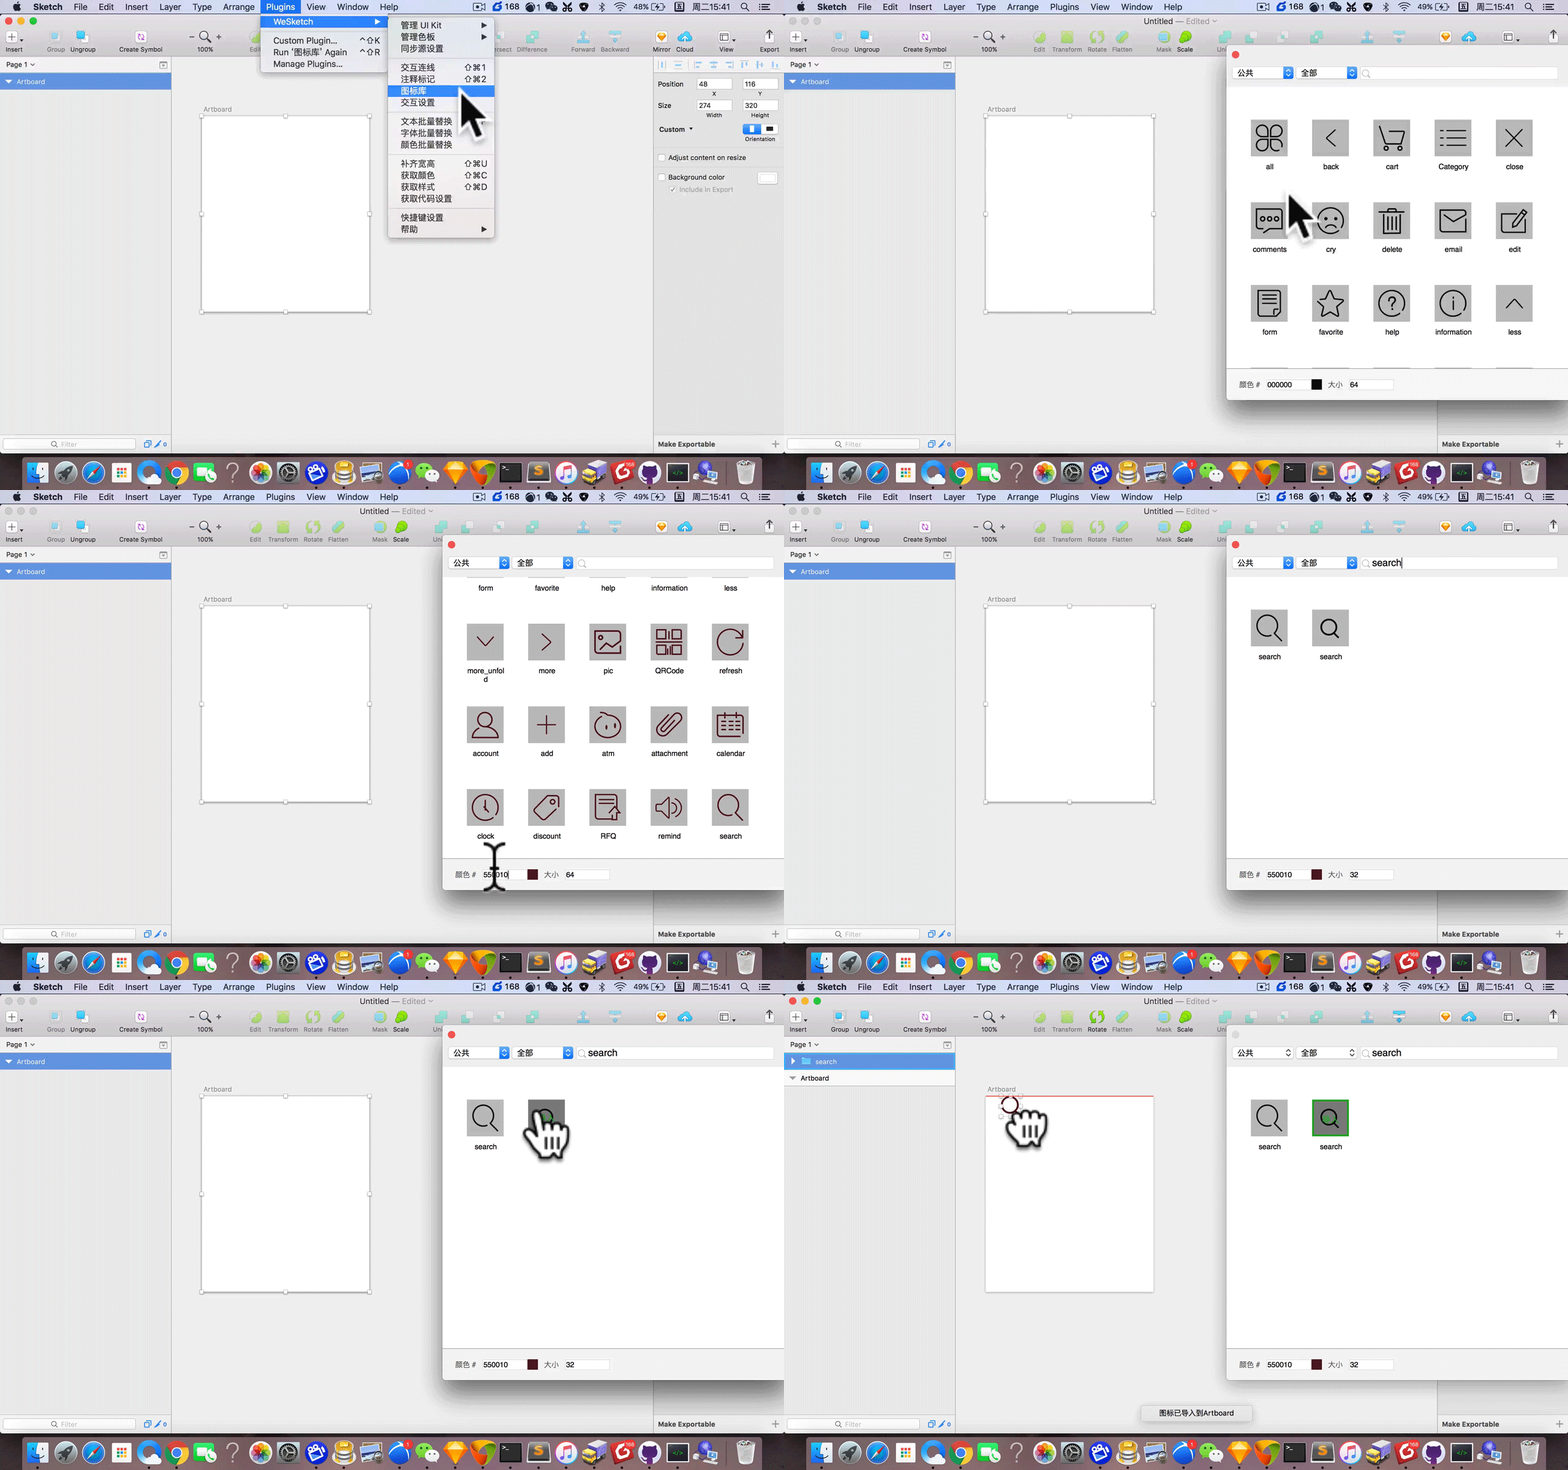
Interface Preview
—END—
Open Source License: View License


