This issue recommends a drag and drop data big screen designer based on VUE – Cola Redese

Cola Designer is a VUE based tool that generates large data screens through drag and drop and configuration, designed to simplify development and improve efficiency
Functional Features
- Code: Implement fully drag and drop+configuration based generation of large screens, design as production. (Dynamic data requires API interface provided by the backend)
- Rapid development& Deployment: The project adopts the popular industry architecture SpringBoot+Vue, which is convenient for development and deployment
- Component rich: Built in excellent open-source report commonly used components such as element, dataV, echarts, etc., to meet basic design requirements
- Customization: The designer supports custom components
Quick Start
Development Environment
| Development version | Recommended version | |
|
mysql |
8.0 |
5.7 + |
|
jdk |
11 |
1.8 + |
|
node |
16.13.1 |
12 + |
|
npm |
8.2.0 |
6 + |
|
vue-cli |
4.5.15 |
2 + |
Project Structure
Technologies used: SpringBoot+SpringSecurity+MySQL+MyBatis Plus+Redis+Vue+ElementUI
Front end directory:

Backend directory:

Run frontend
1. Pull project
2. Switch to the frontend project directory and execute: yarn install
3. After installation is complete, execute: yarn run dev
Precautions
- Before running the backend project, you need to create your own database and run the database script, while modifying the relevant configurations of applicationy.yml
- Default port for backend project: 6882
- For detailed front-end configuration, please refer to vue.config.js
Project Address
https://github.com/colaiven/cola-designerHow to use
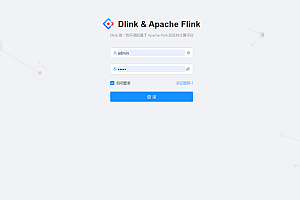
Login
Username: admin
Password: 0000
Large screen management
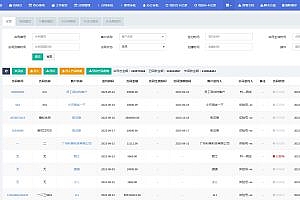
Click the login button to enter the large screen list (as shown in the figure below). The large screen list displays all the large screens created by the current user. Placing the mouse on the large screen will bring up an operation bar, which includes: design, access, share, and delete. Click the button to continue the corresponding operation

Design
Click the design button on the large screen list page to jump to the design interface of the clicked large screen, as shown in the following figure

In the design interface, the left column is the component column. To use it, select the component you want to use, long press the left mouse button and drag it to the dark design area in the middle. After dropping the component, a configurable item form for this component will pop up in the lower right corner, such as font color, size, etc. Modifying the configuration item design area will cause corresponding changes to the component. Some components that are not deeply listening can be synchronized using the refresh button in the data column
Place the mouse over the component in the design interface, and two buttons will appear in the upper right corner of the component, which are copy and delete. Click the button to perform the corresponding operation
Configuration Bar
The configuration bar displays the configurable item form of the currently selected component. In the lower right corner of the design interface, after dragging and dropping the component, it will automatically pop up. You can click the “X” button in the upper right corner of the configuration bar to hide it, and then display the configuration button that needs to be clicked in the lower right corner again

Dynamic Data
After dragging and dropping the
component, it defaults to displaying static data, which can be modified in the data column of the configuration bar in the bottom right corner. It temporarily provides static data, API interface, and SQL for data rendering. When using the API interface, the prefix of the proxy in vue.config.js needs to be added, as shown in the following figure

vue.config.js:
module.exports = {
publicPath: './'</ span>,
outputDir: "docs",
devServer: {
disableHostCheck: true,
port: 8009,
open: true,
overlay: {
warnings: false,
errors: true
},
proxy: {
'/design': {
target: ' http://127.0.0.1:6882 ',
ws: false,
changeOrigin: true,
pathRewrite: {
'/design': ''
}
},
'/fileUrl': {
target: ' http://127.0.0.1:6882 ',
ws: false,
changeOrigin: true,
pathRewrite: {
'/fileUrl': ''
}
},
}
},
}
You can see that the/sign proxy has reached the localhost: 6882 address, and you can configure the proxy yourself to access the interfaces of other backend projects
When using SQL for rendering, you need to enter the corresponding SQL in the text box. Clicking the refresh button will initiate an API request to the backend, with the interface address of/sql/secureSelect, corresponding to the API in the SQL ExecuteController of the backend project. You can change the data source in this interface by yourself
- Note: The data format returned by API interfaces and SQL must be consistent with the format of static data text, otherwise rendering cannot be successful
- Extract fileURL for the convenience of separating resource servers. If there is no separation requirement, it can be consistent with the large screen proxy
Settings
The basic information settings for the large screen can be found in the design button located in the upper right corner of the interface. Users can set the name, background image, access code, and other information for the large screen. Clicking the save button will synchronize it to the database

Import& Export
The import and export function is located in the corresponding button in the upper right operation bar of the design interface, which can be exported as images and design files. The exported design file has a. cd suffix, which is actually a JSON file containing basic information of the large screen, position coordinates of components on the large screen, and configurable data. The import currently only supports importing. cd files, and importing with inconsistent versions will not be successfu
Selected List
To view all the components added to the current large screen, click the list button in the upper right corner. Clicking on a single item component will highlight it, and you can perform copy and delete operations on the component

Preview& Save
Clicking the preview button in the upper right corner will save the current design to the browser’s local storge, and the preview page will render the data from the local storge. Clicking the save button in the upper right corner will save the current design to the database
Resource Library Management
The resource library management manages the image resources that the designer may use. Corresponding to the image component selection function of the designer, designers can upload the cut image of the design to the resource library at once, and can directly select it when using it to avoid duplicate image uploads. When uploading resources, it is necessary to select the corresponding group. Currently, the system defaults to three groups: background library, image library, and material library, which correspond to the data in the database design_img_group table. Users can add or delete them themselves


—END—
Open source protocol: GPL-2.0

