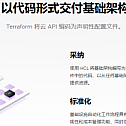
The Terraform recommended in this issue is a tool for building, changing, and versioning your infrastructure securely and efficiently.

HashiCorp Terraform is an infrastructure-as-a-code tool that lets you define cloud and on-property resources in a readable configuration file that you can version, reuse, and share. You can then configure and manage all your infrastructure throughout the lifecycle using a consistent workflow. Terraform can manage low-level components such as compute, storage, and network resources, as well as advanced components such as DNS entries and SaaS functionality.
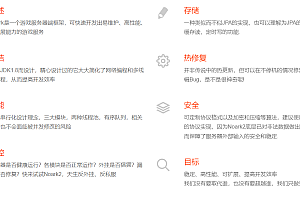
Main features of Terraform
- Infrastructure as code : Describes infrastructure using advanced configuration syntax. This allows you to version and process your data center blueprints just like you would any other code. In addition, infrastructure can be shared and reused.
- Execution Plan : Terraform has a “plan” step that generates an execution plan . The execution plan shows what Terraform will do when you call apply. This allows you to avoid any surprises when operating Terraform’s infrastructure.
- Resource Graph : Terraform builds a graph of all resources and creates and modities any non-dependent resources in parallel. As a result, Terraform builds the infrastructure as efficiently as possible, and operators can gain insight into the dependencies in their infrastructure.
- Change automation : You can apply complex change sets to your infrastructure with minimal human interaction. With the execution plan and resource diagram mentioned earlier, you know exactly what Terraform will change and in what order, thus avoiding many possible human errors.
How does Terraform work?
Terraform creates and manages resources on cloud platforms and other services through its application programming interface (API). The provider enables Terraform to work with almost any platform or service through an accessible API.

Core Terraform workflow consists of three stages:
- Written by: You define resources that may span multiple cloud providers and services. For example, you can create a configuration to deploy applications on Virtual machines in a Virtual Private Cloud (VPC) network with security groups and load balancers.
- Plan: Terraform creates an execution plan that describes the infrastructure it will create, update, or destroy based on the existing infrastructure and your configuration.
- Application: Upon approval, Terraform performs the recommended actions in the correct order and respects any resource dependencies. For example, if you update the properties of a VPC and change the number of virtual machines in that VPC, Terraform will recreate the VPC before extending the virtual machines.

Start using
Install Terraform
To install Terraform, find the right package for your system and download it as a zip archive.
After downloading Terraform, unzip the package. Terraform as a package called Terraform. any other file in the package can be safely deleted and terraform can still run.
Finally, make sure the terraform binary is in your PATH. This process will vary depending on your operating system.
Print the PATH, a list of locations separated by colons.
echo $PATHMoves the Terraform binary to one of the listed locations. This command assumes that the binaries are currently in your download folder and that your PATH contains /usr/local/bin, but you can customize it if your location is different.
mv ~/Downloads/terraform /usr/local/bin/Verifying installation
Verify that the installation is valid by opening a new terminal session and listing the available subcommands for Terraform.
$ terraform -help
Usage:  terraform [-version] [-help] < command>  [args]

The available commands for execution are listed  below.
The most common, useful commands are shown first,  followed by
less common or more advanced commands. If you're  just getting
started with Terraform, stick with the common commands. For the
other commands, please read the help and docs before usage.
# #...
Add any subcommand to terraform -help to learn more about its functionality and available options.
terraform -help planEnable TAB complete
If you use Bash or Zsh, you can enable TAB completion for the Terraform command. To enable autocomplete, first make sure that the shell you choose exists a configuration file.
touch ~/.bashrcThen install the autocomplete package.
terraform -install-autocompleteAfter you install autocomplete support, you will need to restart the shell.
Quick Start tutorial
After installing Terraform and Docker on your local computer, start Docker Desktop.
open -a DockerCreate a file named
learn-terraform-docker-container
mkdir learn-terraform-docker-containerOpen
cd learn-terraform-docker-containerPaste the following Terraform configuration into a file and name it main.tf.
terraform {
required_providers {
docker = {
source  = "kreuzwerker/docker"
version = "~>  2.13.0 "< / span >
    }
  }
}

provider "docker" {}

resource "docker_image" "nginx" {
  name         = "nginx:latest"
  keep_locally = false
}

resource "docker_container" "nginx" {
  image = docker_image.nginx.latest
  name  = "tutorial"
  ports {
    internal = 80
    external = 8000
  }
}
Initializes the project, which downloads a plug-in that allows Terraform to interact with Docker.
terraform initUse apply. When Terraform asks you to confirm the type yes and press ENTER.
terraform applyVerify the existence of the NGINX container by accessing localhost:8000docker ps in a Web browser or running to view the container.
Building infrastructure
< Prerequisites
To follow this tutorial, you will need:
- Terraform CLI (1.2.0+) has been installed.
- The AWS CLI has been installed.
- allows you to create AWS accounts and associated credentials for resources.
To authenticate the Terraform AWS provider with your IAM credentials, set the AWS_ACCESS_KEY_ID environment variable.
export AWS_ACCESS_KEY_ID=Now, set your key.
export AWS_SECRET_ACCESS_KEY=Write configuration
The set of files used in Terraform to describe the infrastructure is called Terraform Configuration . You will write your first configuration to define a single AWS EC2 instance.
Each Terraform configuration must be in its own working directory. Create a directory for your configuration.
mkdir learn-terraform-aws-instanceSwitch to directory.
cd learn-terraform-aws-instanceCreate a file to define your infrastructure.
touch main.tfOpen main.tf in a text editor, paste the following configuration, and save the file.
terraform {
  required_providers {
    aws = {
      source  = "hashicorp/aws"
      version = "~> 4.16"
    }
  }

  required_version = ">= 1.2.0"
}

provider "aws" {
  region  = "us-west-2"
}

resource "aws_instance" "app_server" {
  ami           = "ami-830c94e3"
  instance_type = "t2.micro"

  tags = {
    Name = "ExampleAppServerInstance"
  }
}
Query data using output
Initial configuration
After following the previous tutorials in this collection, you will have one
learn-terraform-aws-instance uses the following configuration to name the directory.
# main.tf

terraform {
required_providers {
aws = {
source  = "hashicorp/aws"
version = "~>  4.16 "< / span >
}
}

required_version = "> = 1.2.0"
}

provider "aws" {
region  = "us-west-2"
}

resource "aws_instance" "app_server" {
ami           = "ami-08d70e59c07c61a3a"
instance_type = "t2.micro"

tags = {
Name = var.instance_name
}
}

# variables.tf

variable "instance_name" {
description = "Value of the Name tag for the EC2  instance"
type        = string
default     = "ExampleAppServerInstance"
}
Ensure that your configuration matches this and that you are already in
Initialize the configuration in the learn-terraform-aws-instance directory.
terraform initApply the configuration before continuing with this tutorial. Use the response confirmation prompt yes.
terraform applyStorage remote status
< Set Terraform cloud
Modify main.tf to add cloud blocks to your Terraform configuration and replace < ORG_NAME> For your organization name
terraform {
cloud {
organization = "< ORG_NAME>"
workspaces {
name = "Example-Workspace"
}
}

  required_providers {
    aws = {
      source  = "hashicorp/aws"
      version = "~> 4.16"
    }
  }
}
< Log in to Terraform cloud
Next, log into your Terraform Cloud account using the Terraform CLI in the terminal.
$ terraform login
Terraform will request an API token for app.terraform.io using your browser.

If login is successful, Terraform will store the token in plain text in
the following file for use by subsequent commands:
/Users/< USER> /.terraform.d/credentials.tfrc.json

Do you want to proceed?
Only 'yes' will be accepted to confirm.

Enter a value:
Confirm yes with a and follow the workflow in the browser window that will open automatically. When prompted, you need to paste the generated API key into the terminal.
< Set workspace variables
The terraform init step, Example-Workspace, creates a workspace in your Terraform Cloud organization. You must configure your workspace with your AWS credentials to authenticate to the AWS provider.
Navigate to
Example-WorkspaceTerraform Workspace in the Cloud, then select the Variables TAB. Add your AWS_ACCESS_KEY_ID and AWS_SECRET_ACCESS_KEY in the Environment Variables section, making sure to mark them as sensitive.

—END—
Open source protocol: MPL-2.0 license