This issue recommends the front-end page block management framework — Magix.

As the front-end world continues to evolve, modern websites are becoming larger and more complex. In this case, Magix uses the idea of separating the site into pages and pages into blocks, and uses each independent block to build the page in the way of block connection, so that no matter how complex the page can be like piecing together a puzzle, realizing the simplification of complexity.
class=”pgc-h-arrow-right” data-track=”7″>
- Easy to use : use the most original syntax, as long as you know html, css, javascript can be used out of the box
- High efficiency : Blocks are independent of each other, which means that defined blocks can be reused anywhere to get more done with less effort
- Future-oriented : For complex and large projects, Magix’s natural micro-front-end architecture, after simple configuration, allows independent projects to access smoothly as blocks
class=”pgc-h-arrow-right”>
- Magix is suitable for single-page application (SPA) projects, and the original design goal is to make single-page application
- Magix can also be used for traditional presentation pages. The more complex the page, the more worthwhile it is to use Magix
- you can also apply Magix to only one section of the page, not the whole page
- Magix does not support multiple instances, that is, only one Magix can exist on the same page. Even so, Magix can be mixed with other frameworks. You can even use Magix functions for certain sections of the page. Magix has high degrees of freedom and scalability

class=”pgc-h-arrow-right”> install
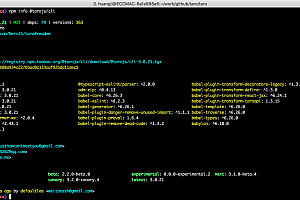
magix currently relies on the scaffolding tool thx-cli, so the development, environment running, package compilation and other functions of magix project need to be based on thx-cli.
First we need to install thx-cli globally
// npm
npm install -g thx-cli

// yarn
yarn global add thx-cli
thx-cli will register thx as the global command after installation, we can directly use thx< command> [options] to use
So we can use the thx-v command to verify that the installation was successful. If the version number is shown, the installation is successful
Initialize
After installing thx-cli, we can start initializing the application.
We can use the thx init command to initialize the application. If we are initializing the application for the first time, thx-cli will prompt to install the Magix-related suite (thx-kit-magix) as follows:
After installing the package, select the template we initialized

Finally enter the application name

class=”pgc-h-arrow-right”> Application run and package build
Local run development
thx-cli provides the dev command for local application development. After successful application launch, the browser will be automatically opened

Package build
thx-cli also provides the build command to package and build the application. The output of the built file is in the build directory


class=”pgc-h-arrow-right”>View base
View composition
Like native front-end development, a view typically consists of three files:
- html file: template file, render page with data
- css file: style file, style related to the current page
- javascript file: essential file, responsible for all logic execution
With compiler support, css files can be replaced by less files, and typescript is also supported. In addition, html files and css files are not required for different block functions. For example, when the current view only provides functional expansion, only one js file
is allowed for template and style needs.
So what are the three files connected by? The answer is: @: placeholder
Let’s look ata concrete example:
When a view related file is structured as:
- index.ts
- index.html
- index.less
The code in the index.ts file is as follows:
import Magix from 'magix'

//
magix.applyStyle('@:./index.less')

export default Magix.View.extend({
  tmpl:'@:./index.html' // 关联html文件
  assign(extra) {
  	this.set(extra)
	},
  async render() {
    await this.digest()
  }
})
You can see that the @: placeholder is important, but it’s not just about linking files, it’s also about introducing css variables.
View data rendering
We mentioned earlier that the html file will combine the data from the js file to render the page. How does this work? The first thing we need to understand is that each view has a data object . You’ve already seen these two functions in the previous code: this.set() and this.digest(). These two functions operate on data objects.
where the set function is used to set data in the view. When the function is called, an object is passed in, and the object is mixed into the data object of the current view.
and the digest function renders the view as , converting the template to real dom. It also supports accepting an object as a parameter that represents the setting data and renders the view simultaneously.
this.set({username:123}).digest()
//
this.digest({username:123})
Once a template in an html file has fetched dynamic data, it is then rendered using simple template syntax: < div> {{= username}}< /div> . The final rendering result of this node is < div> 123< /div>
> Connection between views
We’ve seen the composition and rendering of a view. So how do different views relate to each other? How does magix achieve flexible use between blocks?
Now let’s take an example: we have two views, a and b, and we want to display b in a, that is, we want to introduce b in a, what do we do?
Suppose the directory structure is as follows:
- a.ts
- a.html
- a.less
- b.ts
- b.html
- b.less
Here we introduce a property called mx-view, which magix uses to connect different blocks. For example, to introduce b into a, you only need to write in a.ML: < div mx-view=”@:./b”> < /div>
or you can use the tags that come with magix: < mx-vframe src=”@./b” /> After being compiled by the compiler, it will also be compiled the same as the former. Similarly, components in the component library, after compilation, will also become < div mx-view=” “> < /div> Nodes of this form.
Example
parent-child component communication

Dynamic mount view

—END—
Open source protocol: MIT