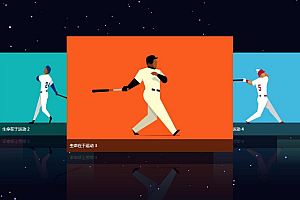
This issue recommends Zerker, a simple and flexible flutter canvas graphics animation library.

Project Description
Zerker is a flexible, lightweight animation library for vibrating canvas graphics.
With Zerker, you can make a lot of seemingly tedious animation effects, such as animated animations, pop-ups, scene transitions, icon effects, and more.
Meanwhile, you can create a lot of simple games with Zerker. Zerker includes elements such as sprites, scrolling backgrounds, and atlases that can be easily used to create game worlds.
Installation
Use this package as a dependency library
Add this to the pubspec.yaml file of the package:
dependencies:
zerker: < latest_version_here>
You can install packages from the command line: use Flutter:
$ flutter pub getAlternatively, your editor may support flutter pub get.
Now in your Dart code, you can use:
import 'package:zerker/zerker.dart'; 
Fast start
Import package
import 'package:zerker/zerker.dart'; < Create the zerker widget
class _MyHomePageState extends State<MyHomePage> {
  @override
  Widget build(BuildContext context) {
    return Scaffold(
        appBar: AppBar(
          title: Text(widget.title),
        ),
        body: Center(
          child: Zerker(app: MyZKApp(), clip: true, interactive: true, width: 350, height: 350),
        ));
  }
}
Creating the Zerker class inherited from ZKApp
class MyZKApp extends ZKApp {

  @override
  init() {
    super.init();
    /// init zerker scene
  }

  @override
  update(int time) {
    super.update(time);
  }
}
Initialize the scene and run the init function
/// Create a zerker sprite
ZKSprite bigboy = ZKSprite(key: "bigboy")
  ..position.x = size.width / 2
  ..position.y = size.height / 2
  ..animator.make("front", [0, 1, 2, 3, 4])
  ..animator.make("left", ['5-9'])
  ..animator.make("after", ['10-14'])
  ..animator.make("right", ['15-19'])
  ..onTapDown = (event) {
    bigboy.animator.play("right", 8, true);
   };

stage.addChild(bigboy);

/// Create a zerker text
ZKText text = ZKText()
  ..setPosition(100, 100)
  ..text = "hello world"
  ..setStyle(color: Colors.blueGrey, backgroundColor: Colors.red[50]);

stage.addChild(_text);
Start a simple presentation

The first step is to create a zerker widget
class _MyHomePageState extends State<MyHomePage> {
  @override
  Widget build(BuildContext context) {
    return Scaffold(
        appBar: AppBar(
          title: Text(widget.title),
        ),
        body: Center(
          child: Zerker(app: MyZKApp(), clip: true, interactive: true, width: 350, height: 350),
        ));
  }
}
< The second step is inherited from ZKApp
class MyZKApp extends ZKApp {< Step 3 Preload assets in init function
init() {
    super.init();
    stage.color = Colors.blueGrey;

    Map<String, dynamic> urls = {
      "boy": {"json": "assets/boy.json", "image": "assets/boy.png"},
      "bg": "assets/bg.png",
    };

    // preload all assets
    ZKAssets.preload(
        urls: urls,
        onProgress: (scale) {
          print("Assets loading ${scale * 100}%");
        },
        onLoad: () {
          initScene();
          _loaded = true;
          print("Assets load Complete");
        });
}
< Step 4 Create various elements
    // add title
    title = ZKText()
      ..position.x = appWidth / 2
      ..position.y = 20
      ..text = "Please click anywhere"
      ..setStyle(
        color: Colors.blueGrey,
        backgroundColor: Colors.greenAccent,
        textAlign: TextAlign.center);
    stage.addChild(title);

    // add boy
    boy = ZKSprite(key: "boy")
      ..setScale(1)
      ..anchor.y = 1
      ..position.x = size.width / 2
      ..position.y = appHeight - 16
      ..animator.make("run", ["Run ({1-15}).png"])
      ..animator.make("jump", ["Jump ({1-15}).png"])
      ..animator.make("dead", ["Dead ({1-15}).png"])
      ..animator.play("run", 25, true);
    stage.addChild(boy);
< Step 5 Add interactive events
_addAction() {
    boy.onTapDown = (event) {
      bg.stop();
      _jumping = false;
      boy.animator.play("dead", 20);
    };

    stage.onTapDown = (event) {
      if (event.target == boy) return;
      if (_jumping) return;

      bg.play();
      _jumping = true;
      boy.animator.play("jump", 20);
      ZKTween(boy)
          .to({"y": appHeight - 120}, 500)
          .easing(Ease.circ.easeOut)
          .chain(ZKTween(boy).to({"y": appHeight - 16}, 500).easing(Ease.circ.easeIn).onComplete((obj) {
                boy.animator.play("run", 25, true);
                _jumping = false;
              }))
          .start();
    };
}


